Custom Timesheets
- Deniz Oğuz
- Gökçe Karaduman
- Ayse Basyigit
Using custom timesheets you can create timesheets for JQL Filters, Team, Projects, Users, Jira SD Organization and Sprints. You can create any timesheet combination. You can also save a timesheet view of what you have created so that you don't need to enter the same information again to display it later.
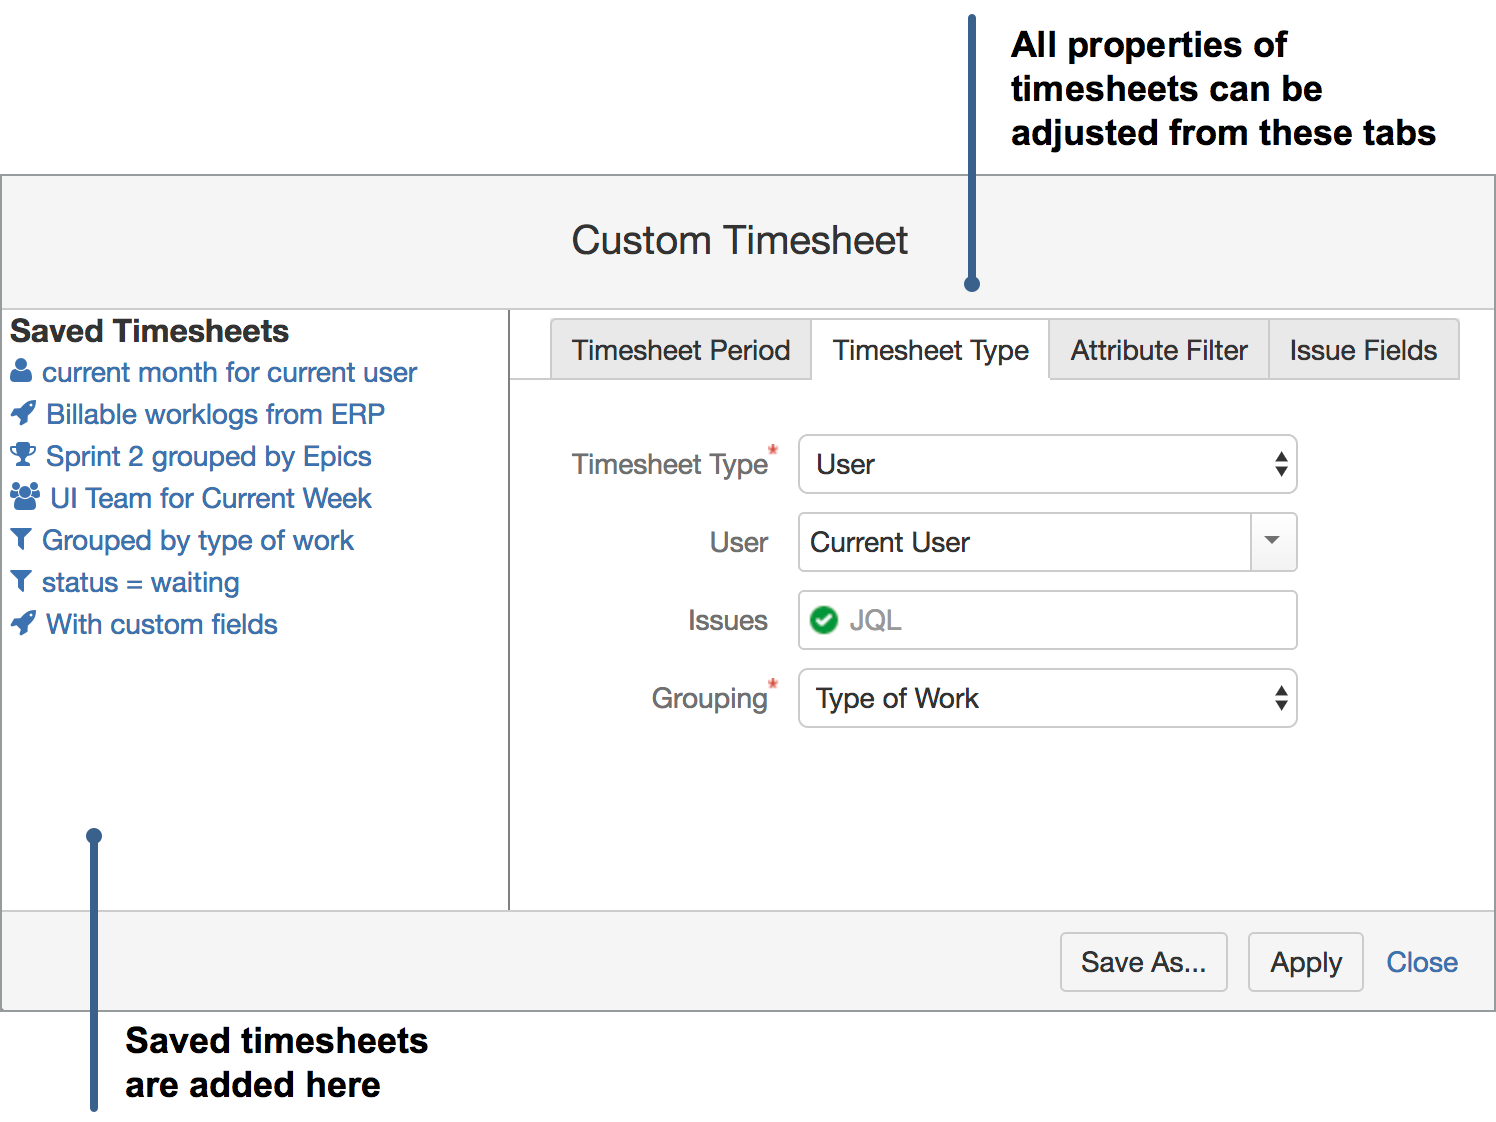
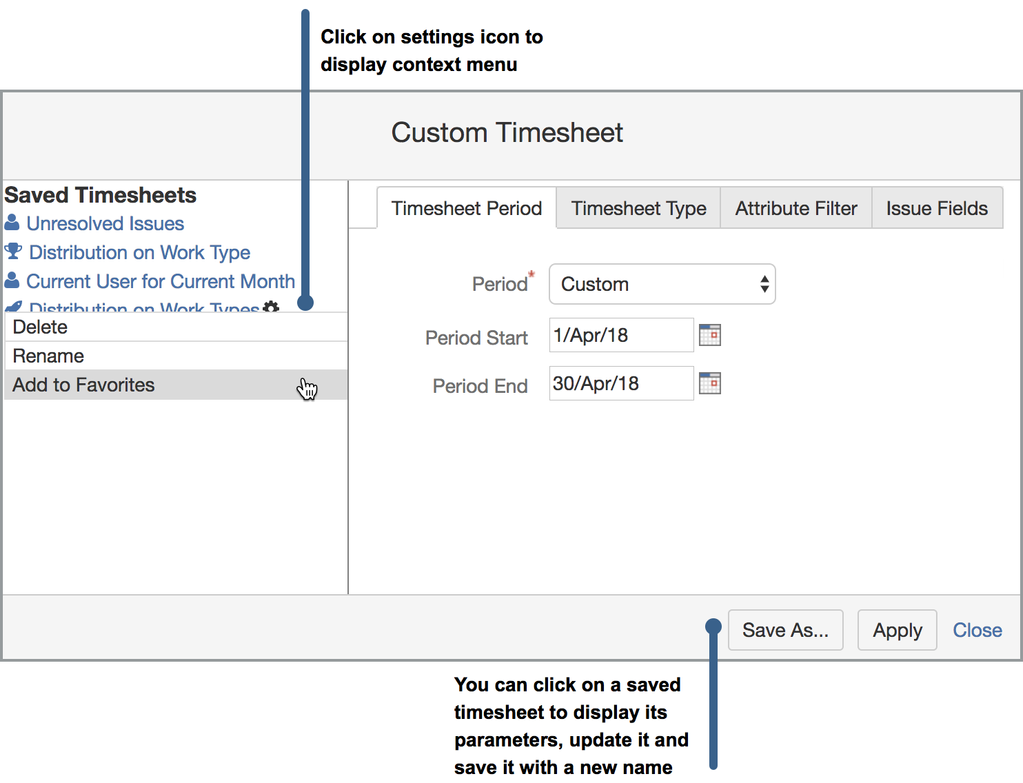
When you open "Custom Timesheet" page from the main menu, custom timesheet dialog is automatically displayed. You can also open this dialog by clicking on the button that shows date range selected on the timesheet window. This dialog has 5 main sections:
- Saved Timesheets: This section lists all previously saved timesheets and allows you to delete, apply or add timesheet to main menu
- Timesheet Period: Allows you to determine period of timesheet
- Timesheet Type: Allows you to determine target to be shown (Team, Projects, Filters, Jira SD Organization, Users, Sprints) and grouping of work logs (Issue, Parent Issue, user, project, epic, work log attributes, Issue Types). In addition to target such as a user you can also specify a JQL to further restrict which issues are included.
- Attribute Filter: Using this section you can filter worklogs to be included in the timesheet. For example you can only filter worklogs which are billable or from a specific work type such as testing, coding etc.
- Issue Fields: You can also show extra issue fields, including custom fields, on the timesheets if you group the worklogs based on issues.
Creating a Custom Timesheet
To create a custom timesheet you need to specify "Timesheet Period" and "Timesheet Type" as minimum. After entering these information you can either save the timesheet with a name or directly press the "Apply" button to display the timesheet.
Selecting Timesheet Period
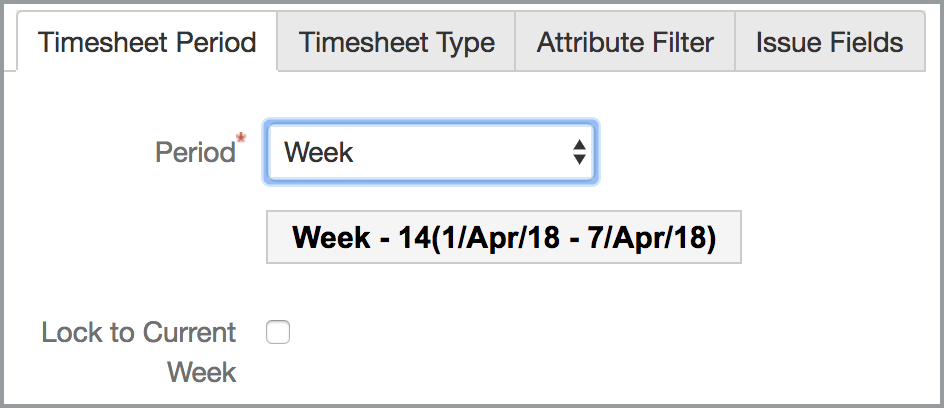
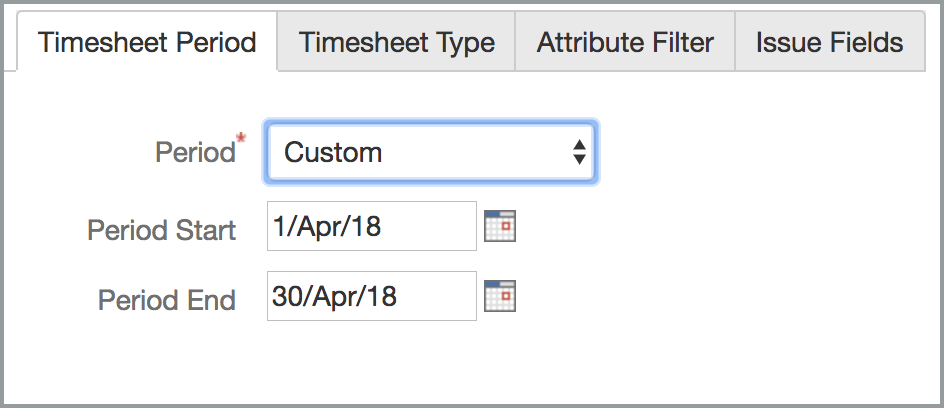
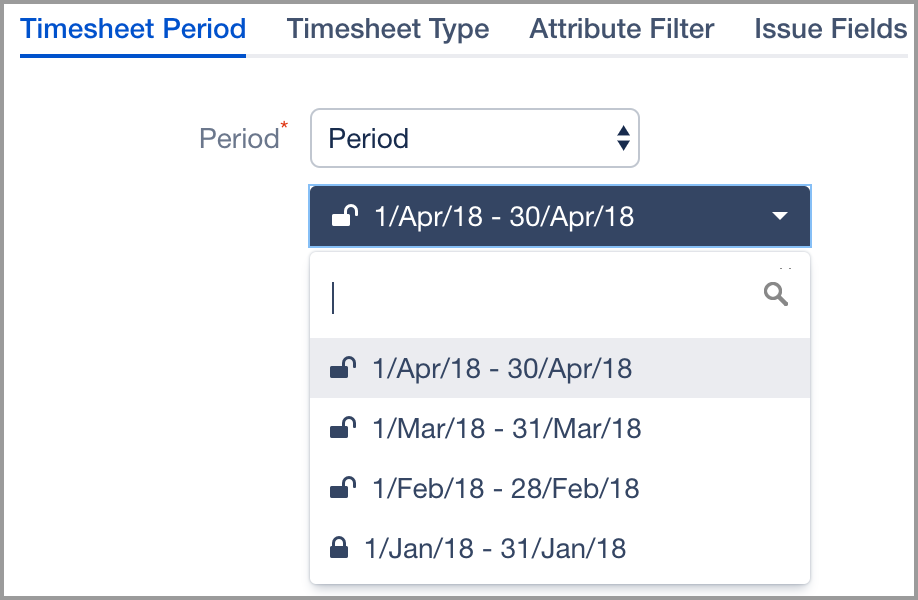
There are 4 period alternatives; Week, Month and Custom, Predefined Periods. Depending on your choice, a different selector is displayed: week selector, month selector and custom date range selector. Below screenshots show these 4 different period selectors. For custom date range selector you have to select an end date that comes after the start date. You can also find further explanation of week selector and month selector in "Common Features of Timesheets" page. For weekly and monthly periods, you can check 'Lock to Current Month' or 'Lock to Current Week' checkbox for timesheet to reflect current week or month every time it is displayed.

Selecting Timesheet Type
In "Timesheet Type" panel you need to specify which worklogs will be included and how they will be grouped. You can specify multiple grouping options to group worklogs as a tree.
Timesheet Types:
- Project: You can select any project you have browse permission
- Filter: You can select any of your favorite filters or a custom filter created by you
- Team: You can select a team you have previously created
- User: You can select a JIRA user
- Sprint: Only available if JIRA Agile is installed. You can select any sprint either active or inactive
- Organisation: Only available if JIRA Service Desk is installed. You can select one of the previously defined organizations. Only issues reported by members of this organization will be returned.
For some timesheet types, you can also enter a JQL for additional filtering of issues. For example you may want to display a team timesheet but only for issues belonging to certain project.
Grouping Types:
You can select multiple grouping criteria.
- Issue: Work logs are grouped by issue independent of whether the issue type is a main issue or a sub-task issue type. Both main issue types and sub-tasks has their own row in the timesheet.
- Parent Issue: Similar to issue grouping. But in this case, work logs entered to for sub-tasks are reported under their corresponding parent issue and sub-tasks does not have their own row in the timesheet. Please also check "Work Log by Parent Issue" graph.
- User (Work Log Author): Work logs are grouped by the user entering the work log
- Reporter: Work logs are grouped by issue reporter. This also covers customers in service desk because they are the reporter of issues raised through service desk.
- Project: Work logs are grouped by project
- Epic: Work logs are grouped by epic. Only available if JIRA Agile is installed
- Issue Type (All): Worklogs are grouped by issue types, including subtasks.
- Issue Type (Main): Worklogs are grouped by main issue types. Worklogs for subtasks are counted inside their respective parent tasks/issues.
- Work Log Attribute: Work logs are grouped by all different values of selected work log attribute type
Applying Timesheet or Saving Timesheet
After entering all required information you can either save the timesheet or apply it. To save the timesheet you can press the "Save As..." button. Timesheet will be added to "Saved Timesheets" list with a temporary "New Name" in editable state so you can easily enter a new name. When you hover over a timesheet name a little ![]() icon will appear. If you click on this icon a popup menu will be opened that will allow you to "Rename", "Delete", or "Add Timesheet to Main Menu".
icon will appear. If you click on this icon a popup menu will be opened that will allow you to "Rename", "Delete", or "Add Timesheet to Main Menu".
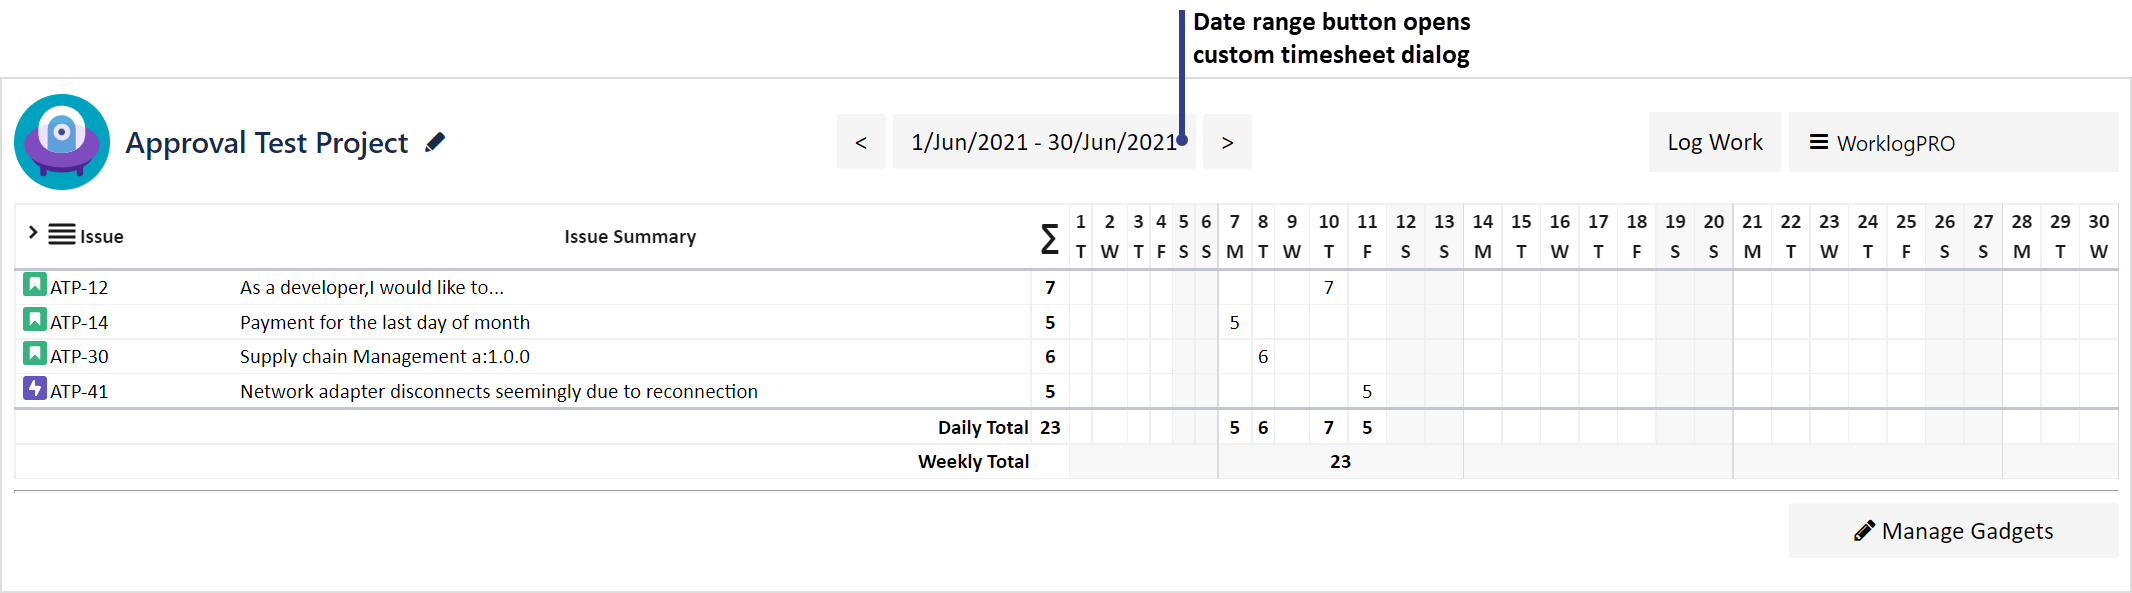
The custom timesheet dialog is opened by pressing the date range button in the upper middle of any timesheet. This dialog is the same as the custom timesheet dialog that opens when creating a timesheet. After creating a timesheet, you can make changes such as changing grouping part, making multiple group levels, changing timesheet type and so on.
Also, you may want to save this modified timesheet. You can save this timesheet thanks to the custom timesheet dialog that opens in the upper middle of this timesheet by pressing date range button. Then, you need to press the "Save As..." button and enter a new name as describes above.
Changing Timesheet After Display
After pressing "Apply" button, timesheet will be displayed. Custom timesheet displayed is very similar to build-in timesheets.
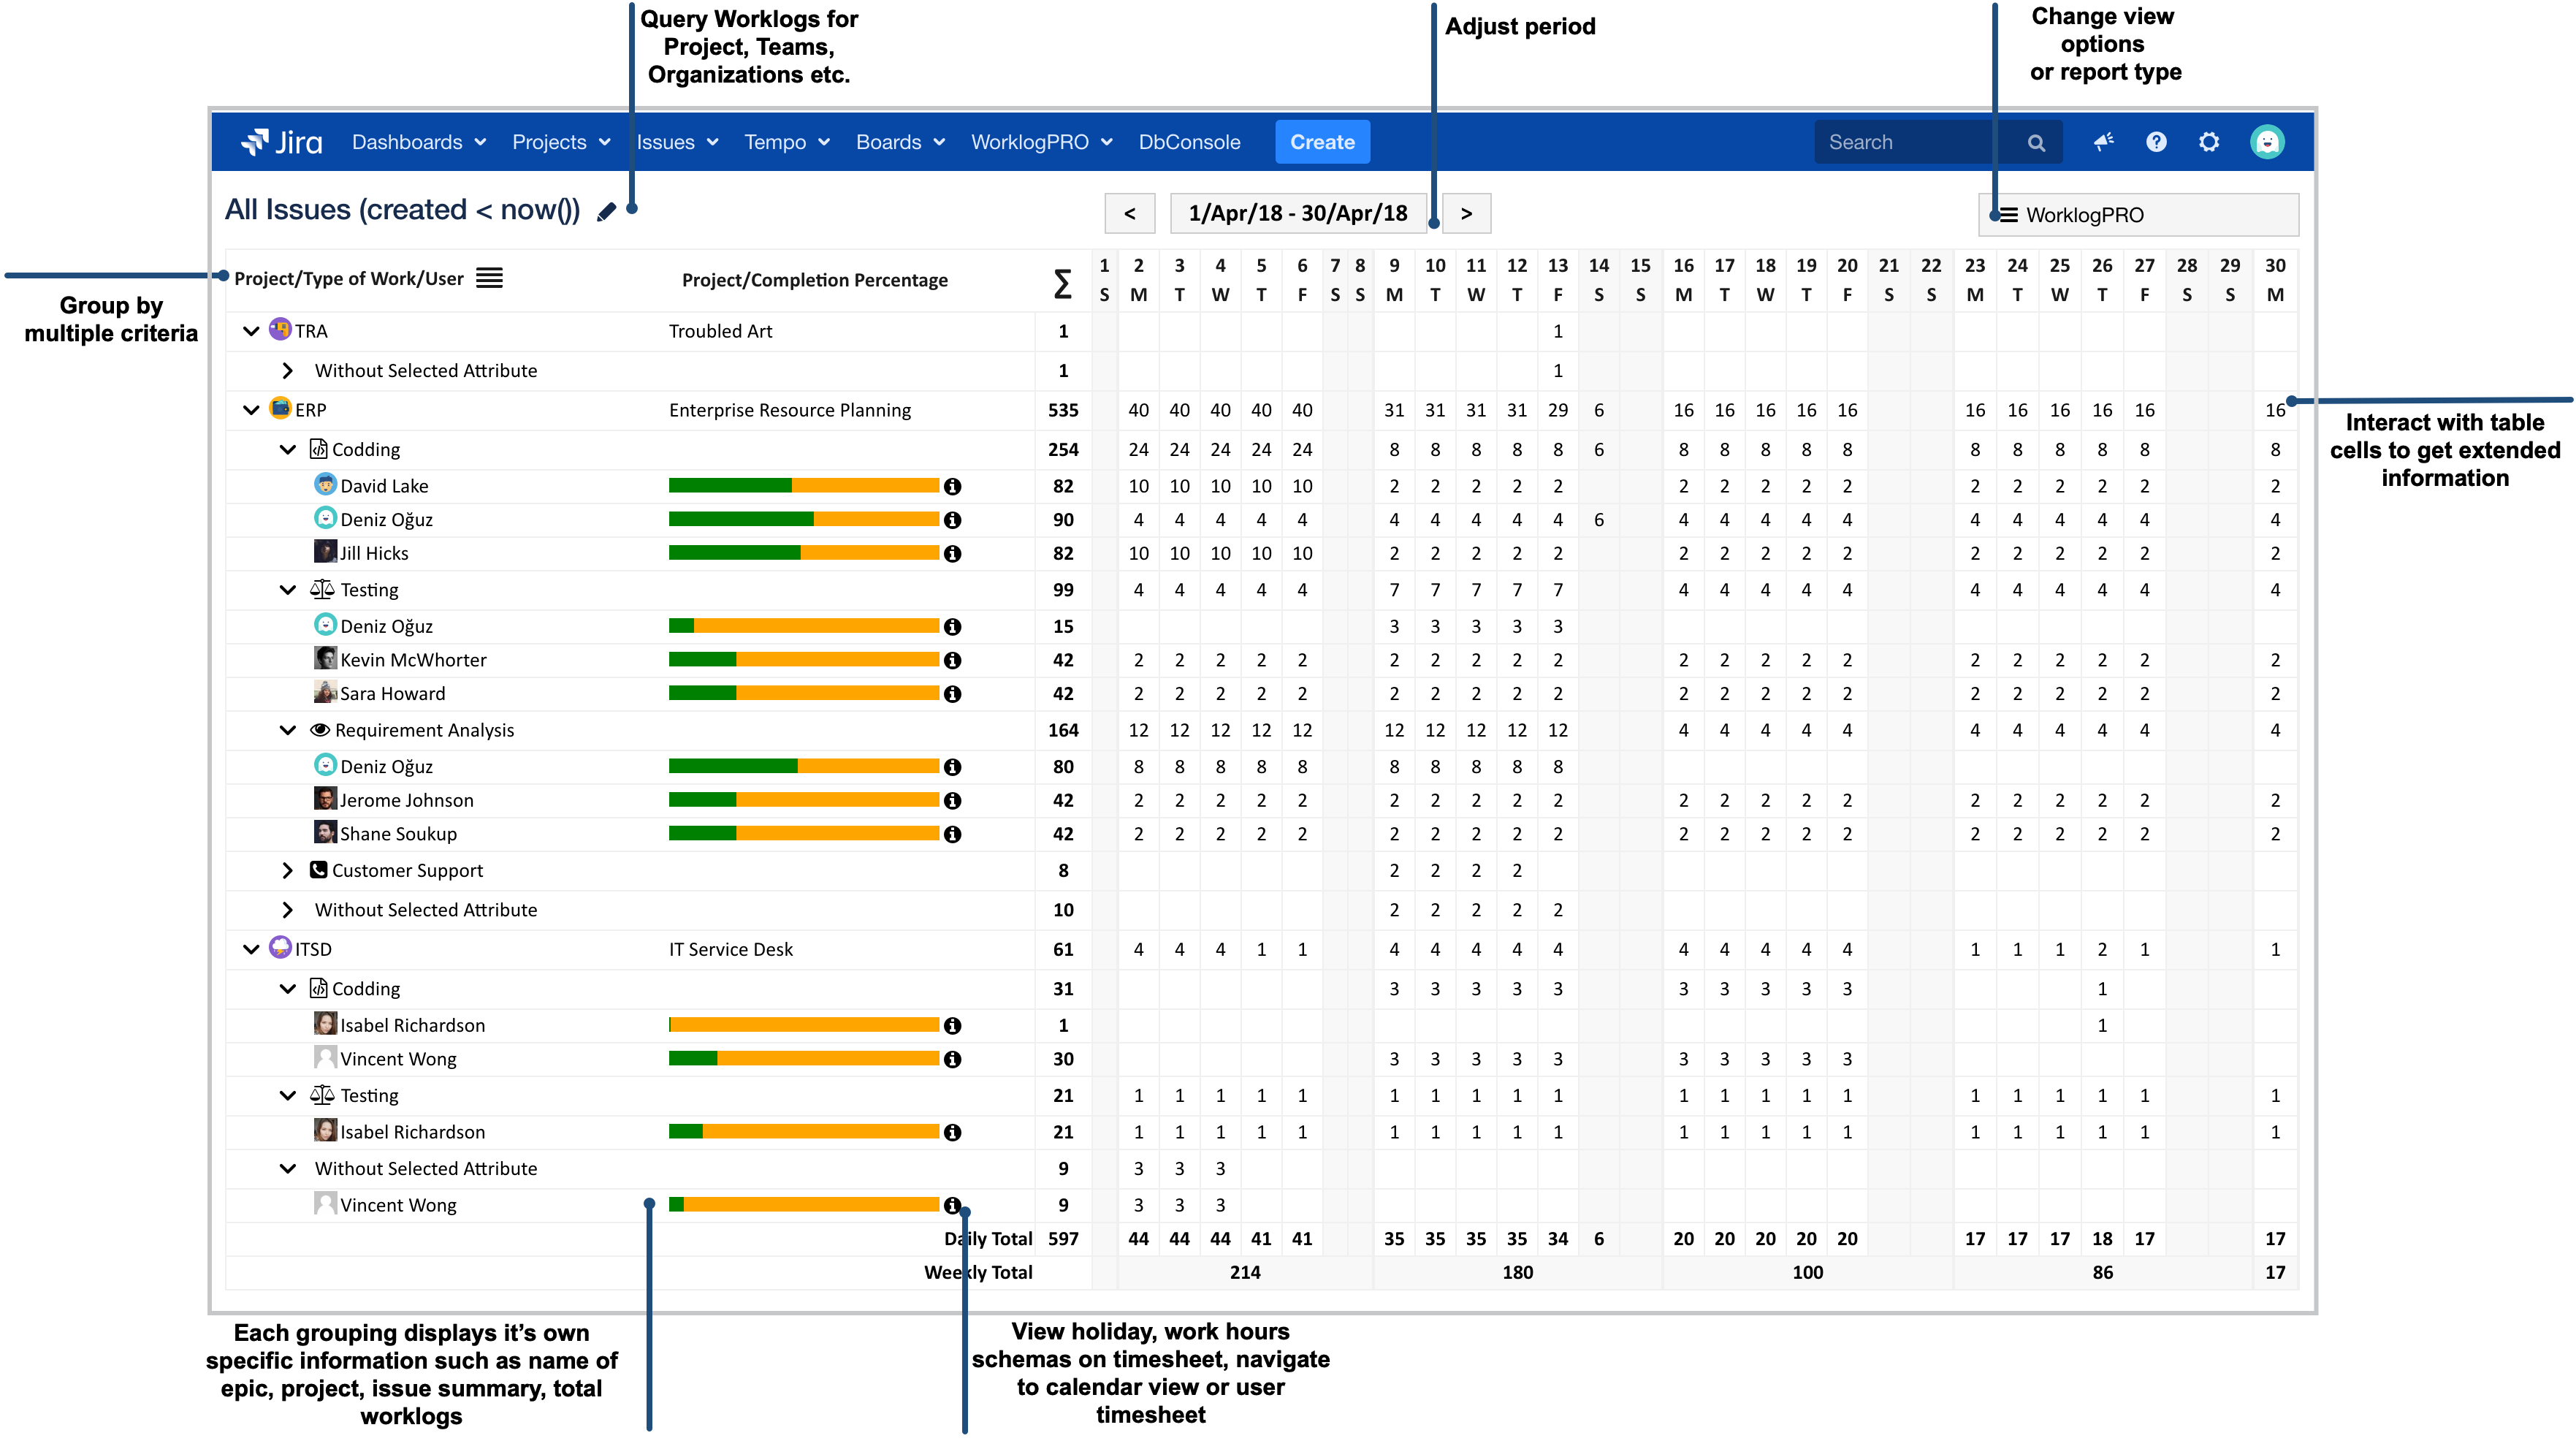
After displaying timesheet you can easily change the target of the timesheet by clicking on the name displayed on top left side of the timesheet. For a project timesheet, this is project name. Simply click on the project name and select a new project from the list. This will display timesheet for the new project re-using the other parameters, period and grouping.
You can also open "Custom Timesheet Dialog" by clicking on the button in the middle top of the timesheet that shows date range. Custom timesheet dialog will be opened with existing timesheet parameters and you can easily make modifications to timesheet.