Common Features of Timesheets
- Deniz Oğuz
- Ayse Basyigit
Every timesheet has common controls as explained below. For this reason we will not explain them again when we are explaining different timesheet types. Colors you see may be different than what is shown in below screenshots, because colors depend on your selected theme.
Missing Worklog Warning
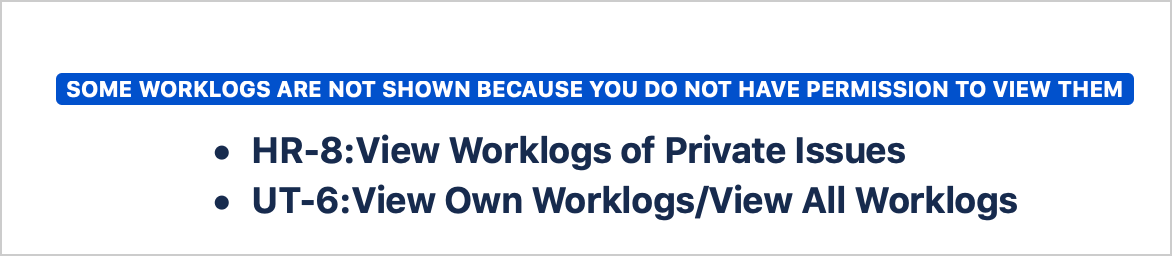
When displaying a timesheet some worklogs may not be visible to current user due to permission settings. In this case by default a general warning message is displayed at the bottom of timesheet. This message does not indicate which issues causing this error, if you want your users to able to see which issues is causing the problem without seeing details of worklogs and the issue you can activate "Show Detailed Error Message" setting of WorklogPRO. Following screenshot shows how users are notified for each scenario.

Week Selector
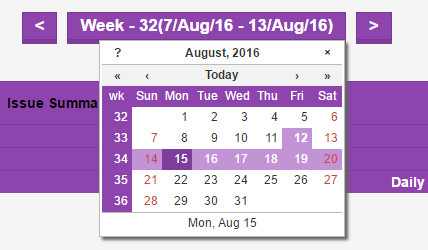
This is available when period mode is set to week. It allows you to select a week from date picker or navigate to next or previous week. Week number is also displayed. To select a week just click on any date of the week. Depending on your "Week Starts" setting (set by administrator or determined by your language selection), week containing the clicked date will be selected.
Clicking on < will automatically select previous week and clicking on > will automatically select next week.
Week Selector Displaying Selected Week

Week Selector with It's Popup
Month Selector
This is available when period mode is set to month. It consists of a month and year sections. By default current year and month is selected. Year selector contains current year and plus/minus 10 years of current selection. If you need a year more than 10 years before or after, you should first select the last year shown and after that list of year should be updated to include more years.
Clicking on < will automatically select previous month and clicking on > will automatically select next month.

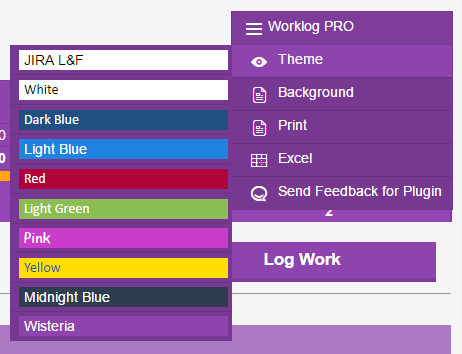
Menu
This menu allows you to change theme, print/export issues and sending a feedback, or switching to "Worklog Report View"
Log Work Button
This button is displayed on the bottom right of every timesheet and allows you to enter new work logs. If newly entered work log affects the current timesheet, timesheet is updated to display new work log. New work log entry may not affect the current timesheet if you enter a date outside of the current date range or to an issue that is not related to that timesheet. For example you are displaying Project A's timesheet and you entered work log for Project B's issue.

Double Click on Table Cell
You can also open "new work log dialog" by double clicking on a table cell if you have permission to log work for the cell.
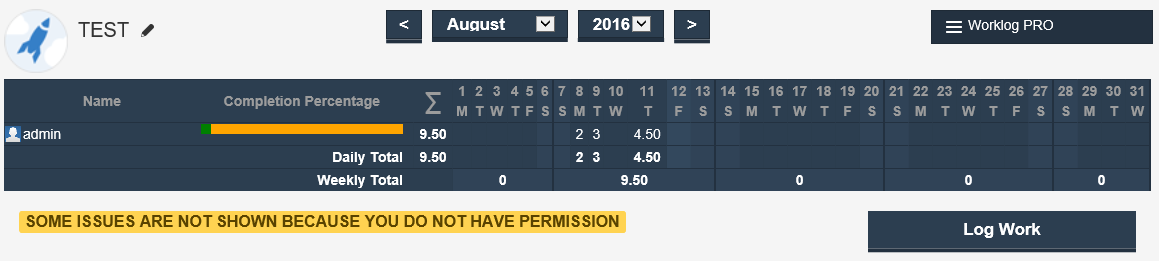
Warning
It is displayed to report any warnings occurred while displaying the timesheet. It is displayed when some issues normally should be displayed are filtered out due to security reasons. For example you may be displaying Project A's timesheet but for issue level security rules you may not have the necessary permission to view some issues even when there are work logs entered for those issues. In this case your timesheet will be displaying missing records and you should proceed with caution. To eliminate this warning you should consult your JIRA system or project admins. This is only one case where this warning is displayed but there may be other scenarios. In short, watch out warnings displayed under any timesheet.
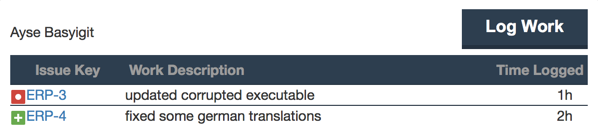
Work Log Panel
You can open Work Log Panel on every timesheet view. For example if a user has entered 5 different work log entries on a single day, or 5 different people entered work logs for the same issue on the same day, you can also see each work log entry line by line. Depending on the timesheet grouping, this table may lists users and their corresponding work logs, issues and their corresponding work logs or both. If there are work log attributes on the work logs they will be also shown column by column next to the work log record.
If you hover on any line, you will see delete and edit work log buttons and you can delete or edit the corresponding work log using these buttons. To see further details of how to delete/edit a work log please refer to "Deleting/Editing Work Logs" section.
You can also add new work logs to corresponding day and issue by clicking on "Log Work" button on the upper right hand side of the table. This will open usual "Log Work" dialog with issue and day pre-selected.
Work Log Entries entered by a User
Work Log Entries entered for an Issue
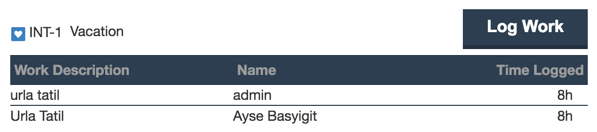
If efforts are grouped by Project or Epic, 'Work Log Panel' shows both the user and issue. In other words it is like combination of above two panel. Depending on the grouping either Epic name or Project name is also displayed on the panel header. If epic name is displayed, header's background is set to epic's color so that you can more easily identify epic.
