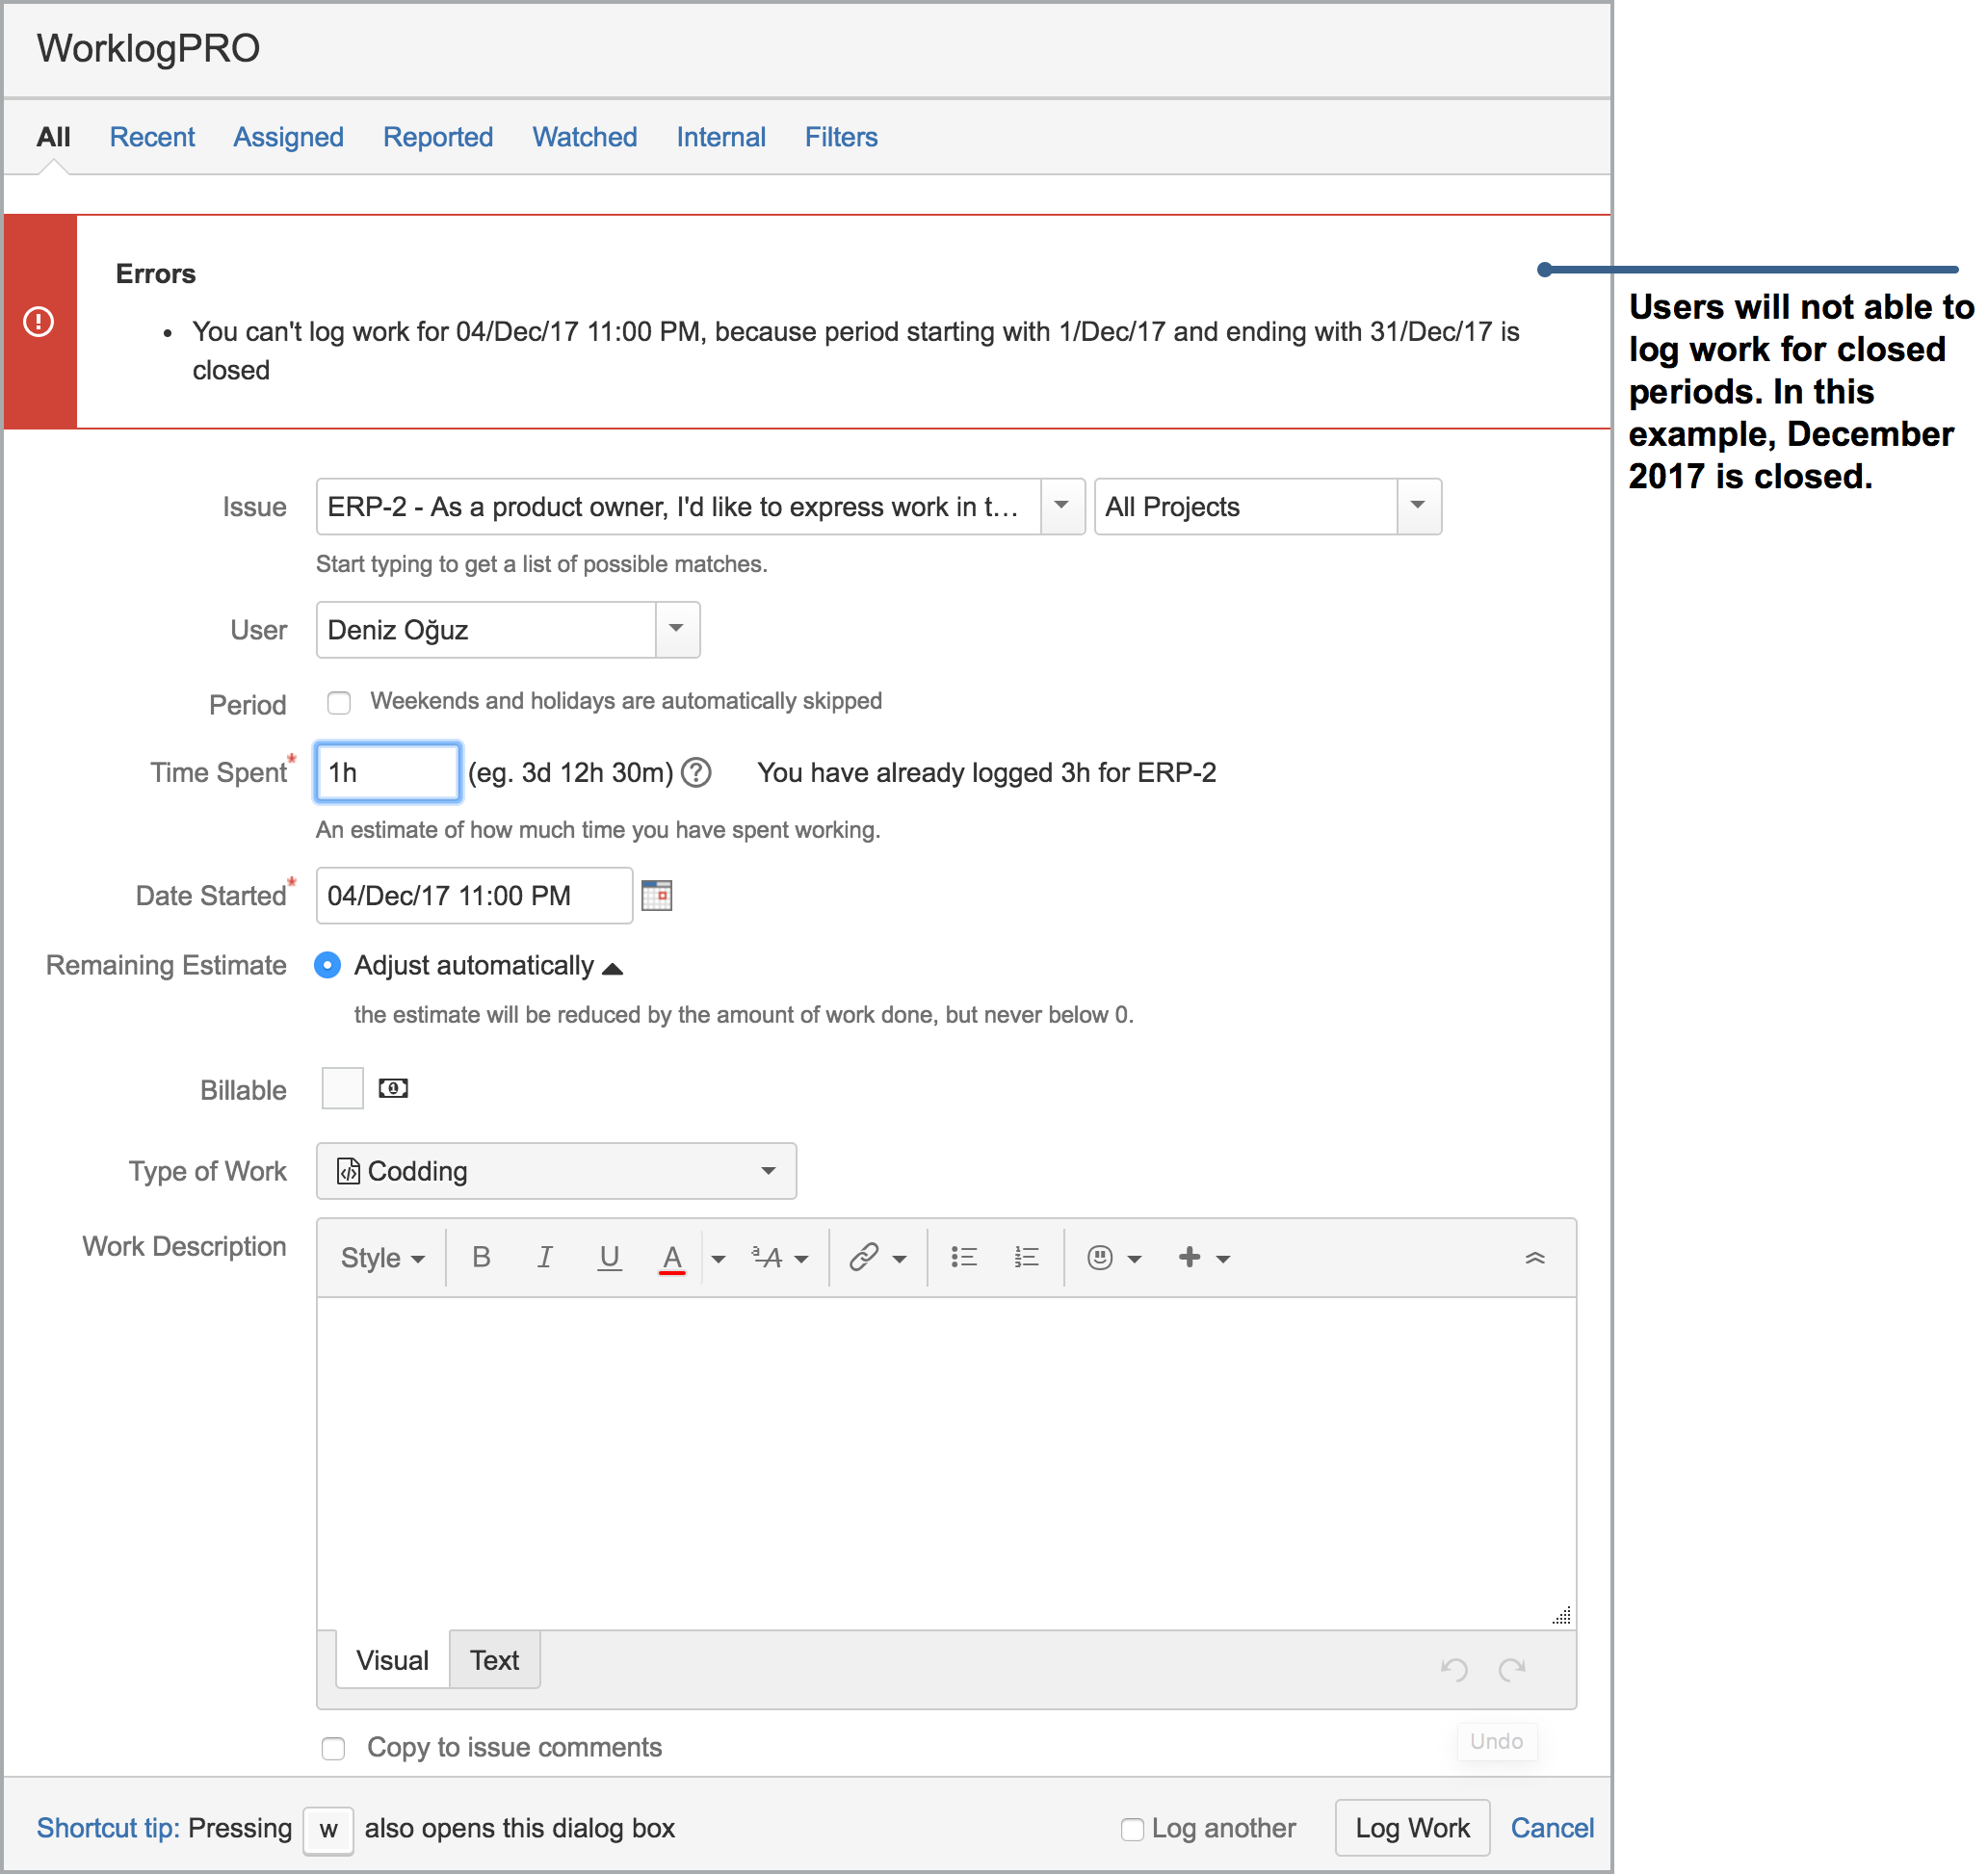
Timesheet periods allows you to disable timesheet entry for specific date ranges. Periods are global and configuring periods require Jira administrator permission. Periods are mostly used to prohibit changing of old worklog records but you can also prohibit entering worklogs for future dates if you want. Users are not allowed to log work for closed periods. Periods are not automatically closed and administrators should open and close periods clicking on the lock/un-lock icon.
Other than individual periods there is also a global restriction to prohibit worklogs in the past or future days on the period list page. These settings prohibit worklogs independent of period state if it is too far in the future or too old. Lets assume that you are using monthly periods and March 2018 is open for worklogs and we are on the 20th of March. According to below settings users will not be able to log work for days older than 4th of March and they will not be able to log work for the days after March 27th. You are not required to define periods but can only use the global limits. Global restrictions are also optional, if you clear all values and save as empty, these global restrictions are completely removed.
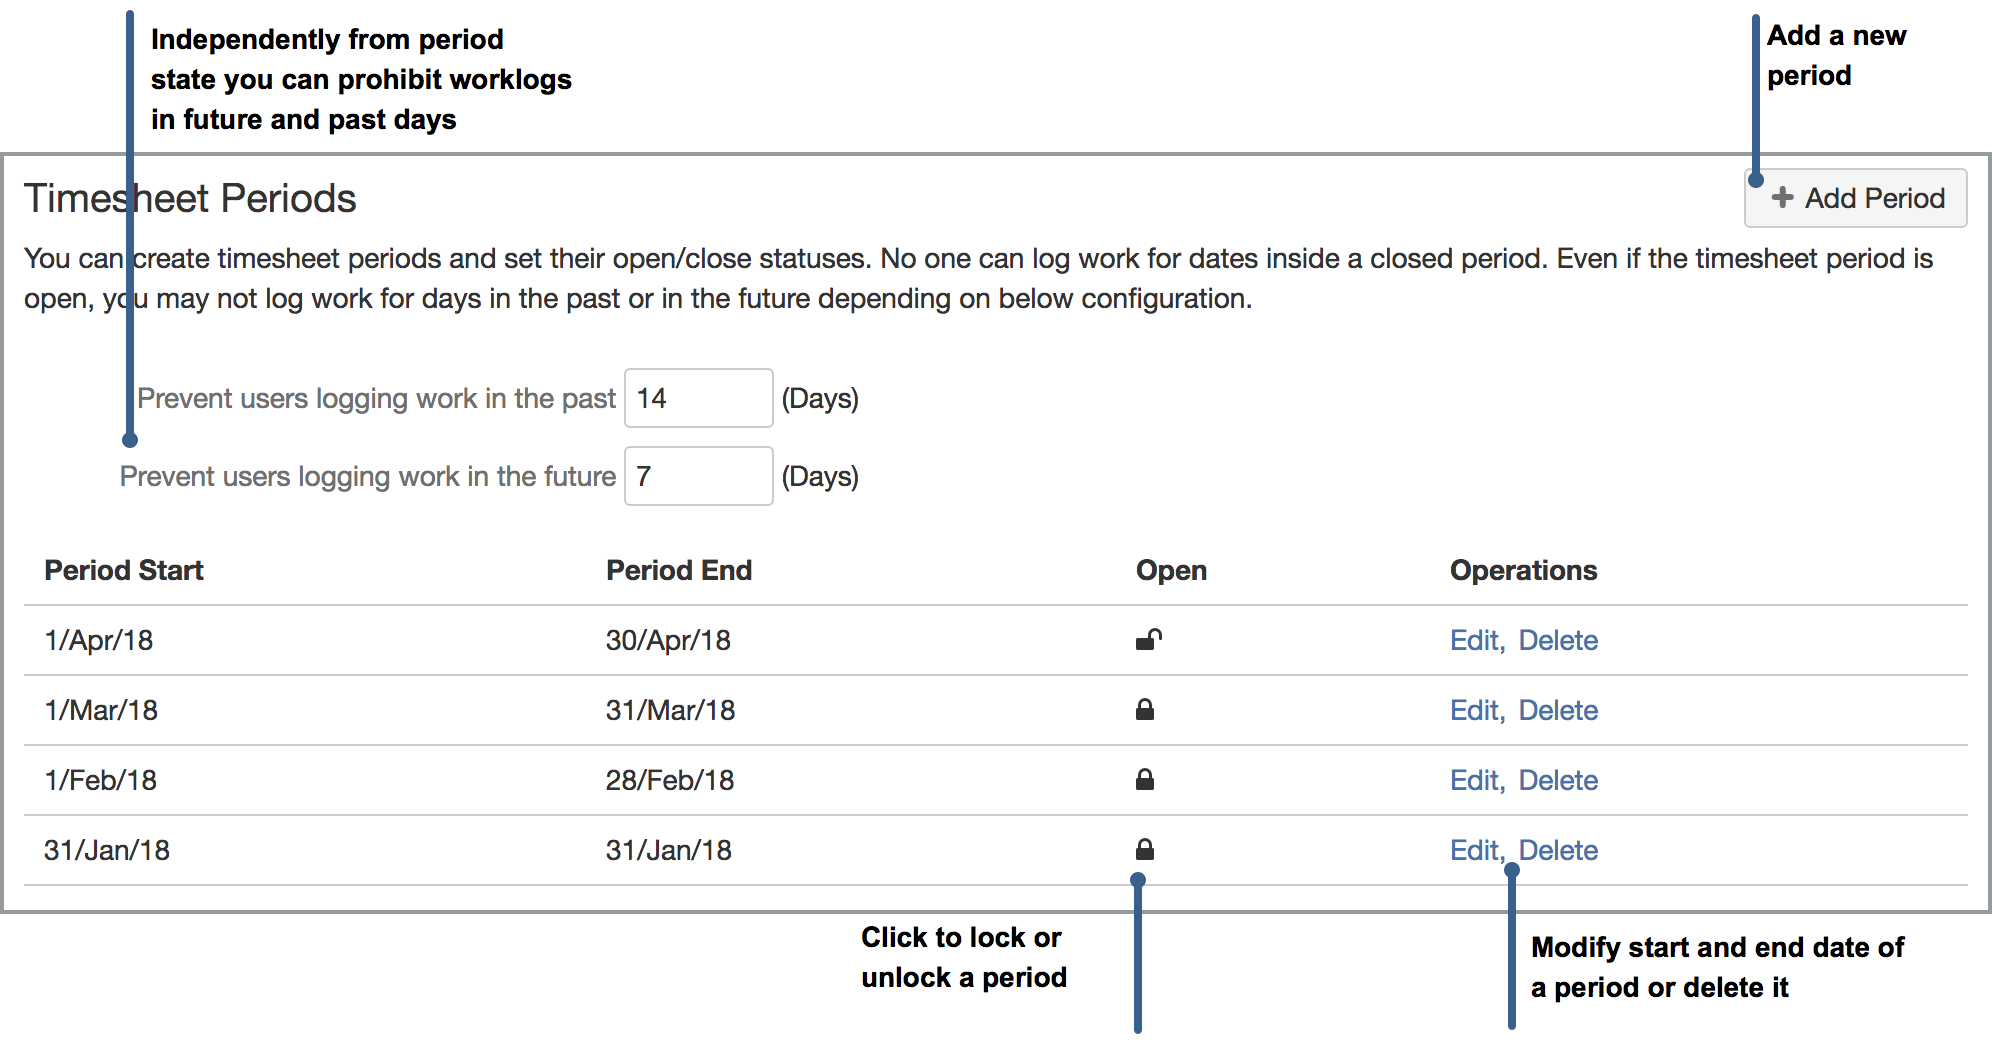
Adding a New Period
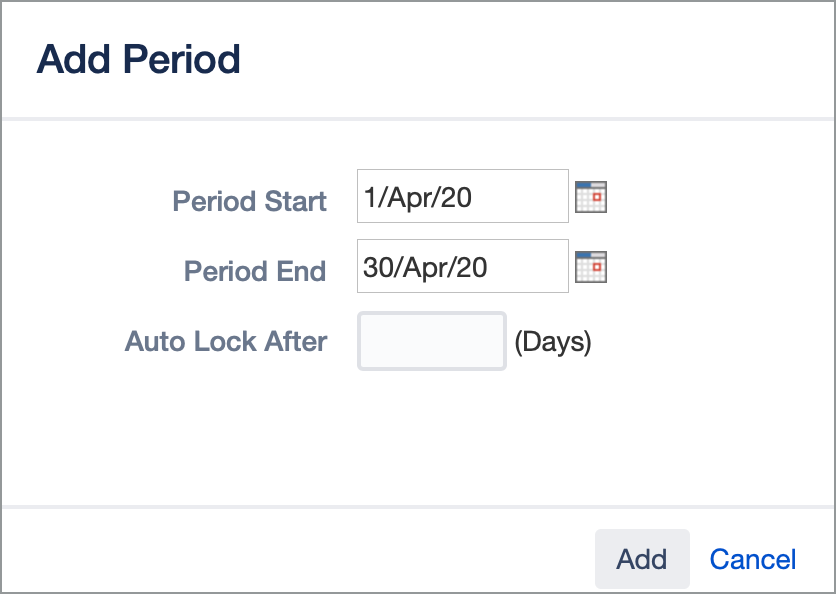
You can add a new period whenever you want, but timesheet periods can't intersect with each other. Start date and end date are inclusive. Timesheet periods are also timezone independent. You can also set an Auto Lock period that will be locked after the defined number of days.
Locking Timesheet Periods
You can lock a timesheet period by clicking on "lock icon" corresponding to period. If a timesheet period is locked no one can add/delete/modify worklogs in that period. If you need to fix a worklog in a period, Jira administrator should open the period for you.
Automatic Creation of Periods
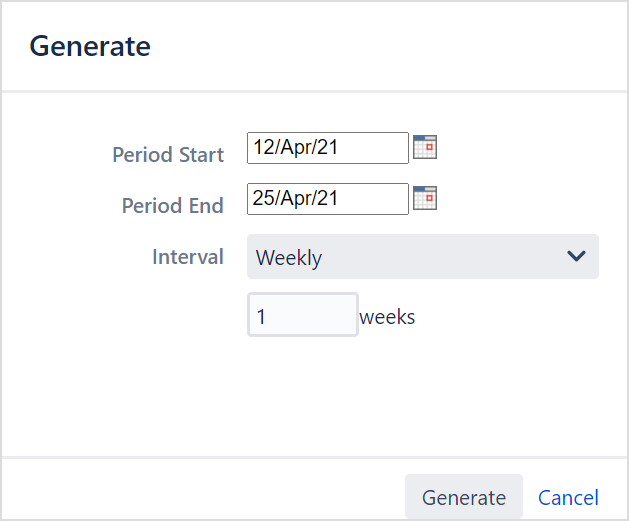
You may want to add period to the timesheet automatically. To do this, you need to make the following settings.
Administration → Manage apps → Timesheet Periods
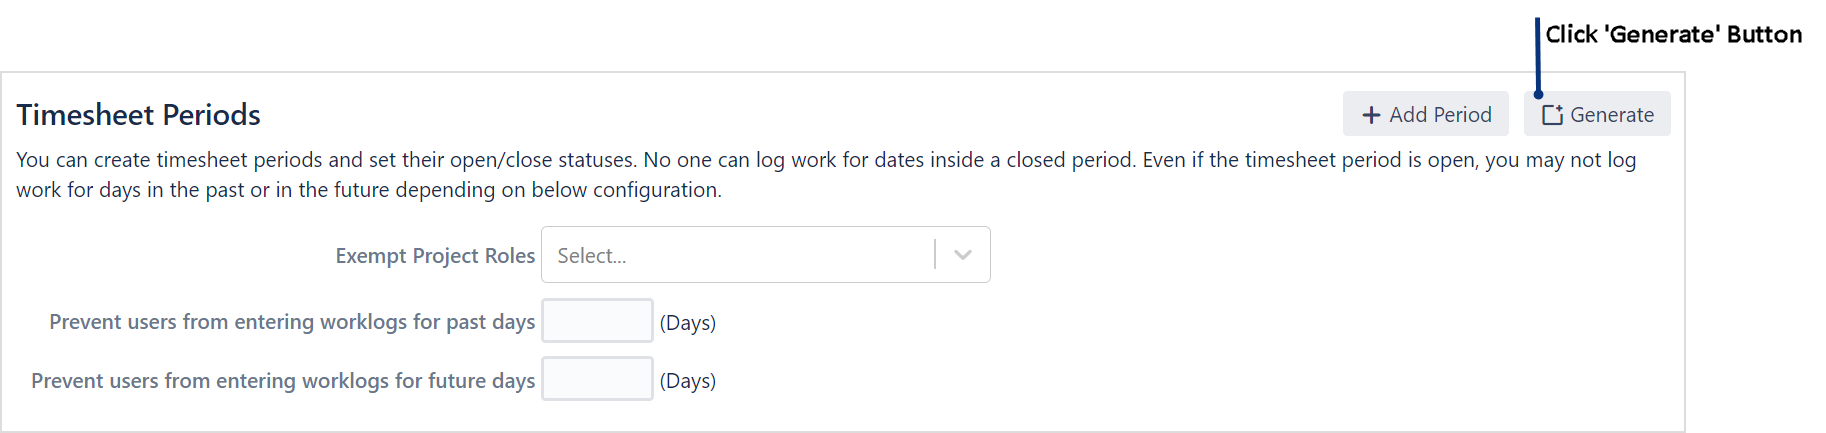
There are three options for Interval which are weekly, daily and monthly. In the 'weekly' option, first of all, you need to specify ‘period start’ and ‘period end'. After selecting 'weekly’ interval, you need to enter a number to 'weeks' part for the date range we set. If you specify '1' for this part, it will create a period for every week in the date range you enter. If you specify 2, it will create a periods with 2 weeks length (14 days).

If the selected date range does not cover whole weeks,
In the case where the number of intervals is '1',when the date range contains more than 1 week, two periods(2 week) containing that interval are automatically created. Similarly, when the date range contains more than 2 week, three periods(3 week) containing that interval are automatically created.
In the case where the number of intervals is ’2', when the date range contains more than 3 week, two periods(14 days for each) containing that interval are automatically created and so forth.
'Monthly' option is the same as 'weekly' option that is mentioned above. There are also 'Daily' option which provides creating flexible period.